This manual explains how to setup Microsoft Outlook 2013 using IMAP to send and receive email for an email mailbox you’ve created with Cloud E-mail Hosting Solution
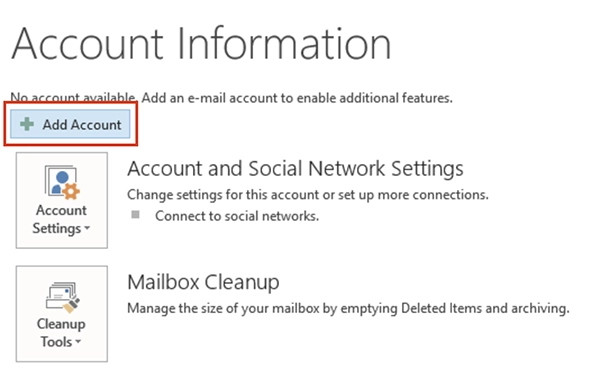
1. Launch your Microsoft Outlook 2013. Select Add Account
2. Choose Manual setup or additional server types and click Next.

3. In Choose Service window appears. Choose POP or IMAP and click Next.

4. On “POP and IMAP Account Settings” window appears.
enter your information as follows
1) User Information
- Enter Your Name and E-mail Address
2) Server Information
- Select IMAP from the drop down
- Incoming mail server : imap.mail-03.thaidata.cloud
- Outgoing mail server (SMTP) : smtp.mail-03.thaidata.cloud
3) Enter the e-mail address and password
4) Click More Settings.

5. Click the More Settings button. then Choose the Outgoing Server tab.
In the Outgoing Server tab, check My outgoing server (SMTP) requires authentication and make sure Use same settings as my incoming mail server is selected

6. Go to Advanced tab and enter Port
- For Incoming server (IMAP) enter : 143
- For Outgoing server (SMTP) enter : 587
Click OK button.

7. Click Next, Outlook should tell you that “all tests completed successfully”

8. You’re finished !
Click Finish, your email account in Microsoft Outlook 2013 is ready to use.